
Introduction
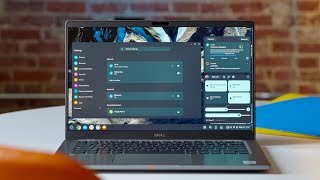
Taking a screenshot is one of those simple yet essential tasks that can make your digital life so much easier. Whether you’re trying to capture an important piece of information, share something funny with a friend, or save a record of an online transaction, knowing how to take a screenshot on your Chromebook is crucial. Although Chromebooks may look different from traditional laptops, capturing your screen is a breeze once you know the steps. Let’s dive into the different methods you can use to take a picture of your Chromebook screen.
What Is a Screenshot?
A screenshot, often referred to as a screen capture or screengrab, is simply a digital image of whatever is currently displayed on your screen. It’s like taking a photo of your screen, capturing everything exactly as you see it. Screenshots are incredibly versatile and can be used for a wide range of purposes, from saving proof of a purchase to sharing a segment of a webpage.
Why Take Screenshots on a Chromebook?
You might wonder why taking screenshots on a Chromebook is particularly useful. Well, Chromebooks are often used for tasks like browsing the web, working on documents, and watching videos—things that often require quick sharing or saving of visual information. Unlike traditional computers, Chromebooks have a unique keyboard layout and operating system, which means the process for taking screenshots is a bit different but just as straightforward.
Understanding the Chromebook Keyboard
Before we dive into the methods, it’s important to familiarize yourself with the Chromebook keyboard. Unlike a traditional keyboard, Chromebook keyboards have a few unique keys. The key you’ll be using the most for screenshots is the “Show Windows” key. This key looks like a rectangle with two vertical lines next to it, and it’s located in the top row of the keyboard, typically where the F5 key would be on a traditional keyboard.
Method 1: Taking a Full-Screen Screenshot
The quickest way to capture everything on your screen is by taking a full-screen screenshot. Here’s how you can do it:
- Locate the “Show Windows” key on your keyboard.
- Press the “Ctrl” key and the “Show Windows” key at the same time.
That’s it! You’ve just taken a full-screen screenshot. The screenshot will be automatically saved in the “Downloads” folder of your Chromebook, and you’ll see a notification pop up to confirm that the screenshot has been taken.
Method 2: Capturing a Partial Screenshot
Sometimes, you don’t need to capture the entire screen—just a specific part of it. Chromebook allows you to take partial screenshots easily:
- Press “Ctrl” + “Shift” + “Show Windows” key simultaneously.
- The screen will dim slightly, and your cursor will change to a crosshair.
- Click and drag to select the area you want to capture.
- Release the mouse button or touchpad to take the screenshot.
This method is perfect for when you need to focus on a particular section of your screen. Like the full-screen screenshot, your partial screenshot will also be saved in the “Downloads” folder.
Method 3: Taking a Screenshot of a Single Window
If you have multiple windows open but only want to capture one, there’s a method for that too:
- Press “Alt” + “Show Windows” key.
- The active window will be captured, and the screenshot will be saved in your “Downloads” folder.
This method is useful for focusing on a specific app or browser window without the clutter of your entire screen.
Method 4: Using the Stylus (for Touchscreen Models)
If your Chromebook has a touchscreen and comes with a stylus, you can use it to take screenshots:
- Tap on the pen icon or stylus button on your Chromebook.
- Select “Capture screen” for a full-screen screenshot or “Capture region” to select a specific area.
Using a stylus offers more precision, especially if you need to capture a small or oddly-shaped area of your screen.
Method 5: Using Chrome Extensions
For those who want more advanced screenshot capabilities, Chrome extensions can be a great option. Here’s how to use them:
- Go to the Chrome Web Store and search for “screenshot extensions.”
- Some popular options include “Awesome Screenshot” and “Lightshot.”
- Install the extension of your choice and follow the on-screen instructions.
These extensions often offer additional features like annotation, delayed captures, and cloud storage integration.
Where to Find and Manage Your Screenshots
After taking a screenshot, you’ll probably want to access it quickly. Here’s how:
- Open the Files app on your Chromebook.
- Navigate to the “Downloads” folder where all screenshots are saved by default.
- From here, you can view, rename, or move your screenshots to different folders.
Organizing your screenshots can help you find them easily later, especially if you take a lot of them.
Editing Your Screenshots
Sometimes, you might want to make some tweaks to your screenshots. Chromebooks offer basic editing tools:
- Open your screenshot from the Files app.
- Click the “Edit” button (it looks like a pencil) to crop, rotate, or adjust the brightness.
- For more advanced editing, consider using apps like Canva or Pixlr available in the Chrome Web Store.
These tools can help you fine-tune your screenshots before sharing or saving them.
Sharing Your Screenshots
Sharing your screenshots is simple:
- Open the screenshot in the Files app.
- Right-click (or two-finger tap) the screenshot and select “Share”.
- Choose your preferred method of sharing, whether it’s via email, social media, or cloud services like Google Drive.
You can also drag and drop screenshots directly into emails or messaging apps.
Troubleshooting Common Issues
Occasionally, you might run into issues when taking screenshots. Here’s how to troubleshoot:
- Screenshot didn’t save? Double-check your “Downloads” folder. If it’s not there, try restarting your Chromebook and taking the screenshot again.
- Screenshot looks blurry? This might happen if the resolution is too low. Ensure your display settings are correct and retake the screenshot.
If problems persist, resetting your Chromebook’s settings may resolve the issue.
Advanced Tips and Tricks
For those who want to get the most out of their Chromebook’s screenshot capabilities:
- Keyboard shortcuts can save you time. Memorizing them will make taking screenshots second nature.
- Tablet mode screenshots: If you’re using your Chromebook in tablet mode, use the physical buttons (Power + Volume Down) to capture the screen.
These tricks can help you capture screenshots more efficiently, whether you’re using your Chromebook as a laptop or a tablet.
Conclusion
Screenshots are a powerful tool that can save you time and enhance your productivity on a Chromebook. Whether you’re capturing a full screen, a specific window, or just a small portion of your display, knowing these methods will make your digital life easier. So go ahead, practice these techniques, and take your Chromebook screenshot game to the next level!
FAQs
Can I change the default location where screenshots are saved?
Yes, you can change the default save location by adjusting the settings in the Files app.
What should I do if my screenshot looks blurry?
Check your display resolution and retake the screenshot. Ensuring your screen is set to its native resolution often helps.
How can I take a screenshot on a Chromebook without a keyboard?
If you’re in tablet mode, use the physical Power + Volume Down buttons to take a screenshot.
Are there any third-party apps you recommend for screenshots?
Yes, extensions like “Awesome Screenshot” and apps like “Lightshot” offer advanced features.
Can I take screenshots of videos on a Chromebook?
Yes, but be aware that some video content might be protected by DRM, which could prevent screenshots from being captured.


Leave a Reply